
Understanding Your KitchenAid Ice Cream Maker
Getting the Most Out of Your KitchenAid Ice Cream Maker
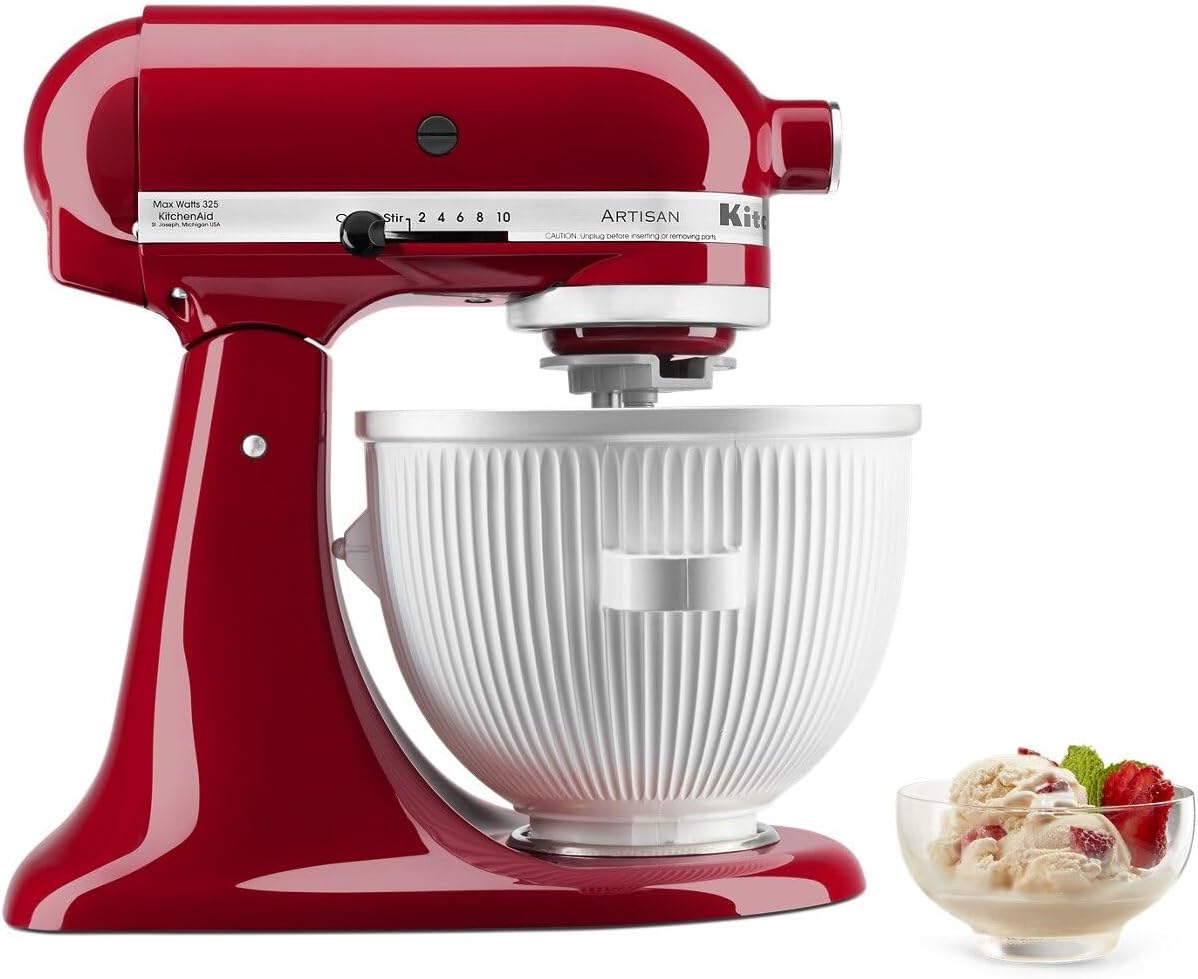
Understanding how to effectively use your KitchenAid ice cream maker is the first step in mastering delightful homemade ice cream recipes. The KitchenAid stand mixer with its cream maker attachment is a versatile tool that simplifies the process of making ice cream at home. To begin, ensure that you have all the essential ingredients like milk, heavy cream, and sugar, ready for your chosen recipe. For classic flavors such as vanilla, a few teaspoons of vanilla extract will play a crucial role. Your bowl must be adequately prepared by leaving it in the freezer for at least 15 hours before use. This ensures that your ice cream will achieve the perfect creamy texture. Let the base mixture chill in the refrigerator for a couple of hours to develop a rich flavor before pouring it into the frozen bowl. The innovative attachment allows for an even churn and works seamlessly with your mixer to transform ingredients into creamy ice cream within 20-30 minutes. Having a solid grasp of these basics will not only ensure the success of classic recipes but also prepare you for experimenting with innovative flavor combinations. For those looking to expand their skills further, consider essential tips for achieving the perfect texture, and be ready to troubleshoot any common issues that may arise during the process. Lastly, proper storage techniques are key when it comes to preserving your homemade ice cream’s integrity. For those interested in expanding their kitchen appliance repertoire, discovering the right ice maker for home use can be beneficial. This knowledge can enhance your capability to create excellent frozen desserts and beverages.Classic Vanilla Ice Cream Recipe
Crafting the Perfect Vanilla Ice Cream at Home
Creating a classic homemade vanilla ice cream is a delightful yet straightforward process with your KitchenAid ice cream maker attachment. This versatile tool will help you whip up a creamy and smooth dessert in just minutes, making it an enduring favorite in any kitchen. The key to mastering this classic is understanding each ingredient's role and the perfect combinations.
Start by assembling your ingredients:
- 2 cups heavy cream
- 1 cup whole milk
- ¾ cup sugar
- 2 teaspoons vanilla extract
Prepare your cream base by combining the heavy cream, whole milk, and sugar in a medium saucepan. Warm over low heat, stirring continuously until the sugar has completely dissolved. Be careful not to bring the mixture to a boil. Once the sugar is dissolved, remove the saucepan from heat and stir in the vanilla extract. Allow this base to cool before transferring to the refrigerator for a couple of hours. Cooling the mixture is essential to achieving the best texture.
When you're ready to churn, ensure the freeze bowl of your KitchenAid stand mixer has been chilled for at least several hours in the freezer. Assemble the ice cream maker attachment according to the manufacturer’s instructions, ensuring everything fits snugly in place on your mixer. Pour the vanilla cream base into the bowl, and set your mixer to the recommended speed. Let it churn for about 20 minutes or until it reaches your desired consistency.
For a handy guide on choosing the best crushed ice machine, explore our detailed resource to elevate your ice cream experience.
Enjoy your freshly made vanilla ice cream immediately for a soft-serve style, or transfer it to an airtight container and let it firm up in the freezer for a few hours for a more traditional texture.
For a creative twist, consider adding mix-ins like chocolate chips or fresh fruit during the last five minutes of churning. You can explore various innovative flavor combinations later on in our blog post.
Innovative Flavor Combinations
Unconventional Flavor Pairings
Crafting homemade ice cream using your KitchenAid stand mixer with an ice cream maker attachment opens the door to a world of innovative flavor combinations. Departing from the classic vanilla base, you can experiment with various ingredients to create unique taste experiences.- Fruit and Herbs: Blend fresh fruits like strawberries or peaches with herbs such as basil or mint. The mixer ensures a smooth mixture while the herbal notes add a refreshing twist.
- Spices and Chocolate: Consider infusing spices like cinnamon or cardamom into a chocolate ice cream recipe. This combination fits perfectly with accurate measurements of sugar and milk.
- Savory Elements: If you're feeling adventurous, try incorporating savory ingredients like olive oil or balsamic vinegar. These additions can complement a rich, creamy base.
- Mix-Ins: Enhance texture by mixing in nuts, toffees, or cookie pieces during the last couple of minutes of churning.
Tips for Perfect Texture
Achieving That Perfect Creamy Texture
Crafting the ideal ice cream texture in your KitchenAid ice cream maker is an art that requires a bit of science and patience. Using the correct combination of ingredients and techniques can transform your mixture into a smooth, creamy delight.- Balance Your Ingredients: Start with a rich cream base. The balance between heavy cream, milk, and sugar is crucial. For a classic vanilla ice cream, use a high-quality vanilla extract to enhance the flavor subtly. Remember, the higher the cream content, the richer the texture.
- Chill Thoroughly: Before starting the churning process, make sure your ice cream mixture is chilled properly. Ideally, refrigerate the mixture for several hours or even overnight. This will help the freezing process and enhance the creaminess.
- Pre-Freeze the Bowl: Ensure your KitchenAid ice cream maker attachment bowl is frozen for a minimum of 15 hours. This keeps the mixture at the optimal temperature during the churning process.
- Mind the Churning Time: Be attentive to the churning duration. Depending on the recipe, 20 to 30 minutes are usually sufficient. Over-churning can lead to a grainy texture.
Consistent, Quality Ingredients
Consistency with your ingredients ensures every batch turns out just right. Use fresh cream and milk, and experiment with different chocolate, vanilla, or fruit additives to innovate while maintaining that luscious texture. Careful consideration of these factors will ensure your homemade ice cream is consistently creamy and delicious each time. Adjusting these variables helps achieve the balance tailored to your taste and preferences.Troubleshooting Common Issues
Identifying and Solving Common Ice Cream Maker Issues
Even with the best KitchenAid ice cream maker, you might encounter some hiccups along the way. Here are some common issues and how to troubleshoot them effectively.
Ice Cream Not Freezing Properly
If your ice cream mixture isn't freezing as expected, ensure that the freeze bowl has been in the freezer for at least 15 hours. The bowl needs to be thoroughly frozen to achieve the right consistency. Also, check that your cream base is chilled before adding it to the maker. If the problem persists, consider reducing the sugar content in your recipe, as too much sugar can prevent freezing.
Texture Issues
For a smooth, creamy texture, make sure your ingredients are well-mixed before pouring them into the freeze bowl. Using a stand mixer with the appropriate attachment can help achieve this. If your ice cream is too icy, it might be due to an imbalance in the cream and milk ratio. Adjusting the cream content can help, as well as ensuring the mixture is properly chilled before freezing.
Mixture Overflow
Overflow can happen if the bowl is overfilled. Always leave some space for the ice cream to expand as it freezes. It's recommended to fill the bowl only halfway to avoid any spillage.
Uneven Freezing
If the ice cream is freezing unevenly, make sure the bowl is properly seated on the tilt head of your KitchenAid stand mixer. An improperly attached bowl can lead to uneven churning and freezing.
Flavor Not Distributing Evenly
To ensure flavors like chocolate or vanilla are evenly distributed, mix them thoroughly into the base before starting the freezing process. Using a mixer attachment can help achieve a uniform mixture.
By addressing these common issues, you can enjoy a smooth and creamy homemade ice cream experience every time. Remember, practice makes perfect, and experimenting with different recipes and techniques will help you master your KitchenAid ice cream maker.
Storing and Serving Your Homemade Ice Cream
Proper Storage Techniques
After investing time into creating your delicious vanilla or chocolate ice cream using the KitchenAid ice cream maker attachment, storing it correctly is essential to maintain its flavor and texture. Once your homemade ice cream has completed its initial spin in the mixer, transfer it promptly to an airtight container. This minimizes exposure to air, which can lead to ice crystals forming and affecting the texture.
Optimal Conditions for Freezing
Place the container at the back of your freezer, where the temperature remains most consistent. If you have the option, use the deep freeze compartment to keep your ice cream at its best. Let your ice cream freeze for a minimum of 2 hours to develop a firmer consistency before serving. This ensures that every scoop retains the smooth and creamy texture achieved during the mixing process.
Making Serving a Breeze
Before serving your homemade ice cream, allow it to sit at room temperature for a few minutes. This helps in softening the ice cream slightly, making it easier to scoop and enhancing the enjoyment of classic vanilla and innovative flavors alike. Serve with the right tools, like an ice cream scoop, to achieve perfectly rounded servings.
Maintaining Freshness Over Time
For longer storage, ensure that no other food odors are present in the freezer, as these can be absorbed by your ice cream. Label your ice cream with the date it was made to keep track of its freshness. Ideally, enjoy your homemade ice cream within two weeks to fully savor the flavors that you've crafted with your KitchenAid stand mixer.