How to make clear ice at home with directional freezing
Why clear ice matters for serious home drinks
Clear ice changes how a drink looks and how it tastes. When you learn how to make clear ice at home, you control dilution and keep every drink balanced for longer, because clear ice melts slower than standard cloudy ice cubes and releases fewer trapped air bubbles into the glass. For any cocktail hobbyist building an ice home setup, mastering clear ice means your freezer becomes part of your bar program, not just cold storage.
Cloudy ice forms when tap water freezes from all sides at once and traps air and impurities in the center. That chaotic freezing process creates white cores, weak spots, and air bubbles that make the ice cloudy, so the cube cracks faster and melts into your drinks more quickly, which can flatten flavors in spirit forward cocktails. When you make clear cubes correctly, you guide the freezing direction so the water pushes air and minerals away from the part you plan to use, leaving a dense, glass like block that behaves like professional bar ice.
At home you will notice that one clear ice cube in a whisky drink keeps structure far better than several small cloudy ice cubes from a basic tray. In informal side by side tests by home bartenders, a single 5 centimeter clear cube in a 200 milliliter whisky pour often takes roughly 20 to 30 minutes to dilute the drink by about 25 percent, while a handful of standard cloudy cubes can reach similar dilution in closer to 10 to 15 minutes. These figures are practical estimates rather than lab measurements, but they match what many bartenders report in training guides. Once you understand how to make clear ice at home with directional freezing, you can scale from one container of ice to multiple containers and always have clear ice cubes ready for guests.

The science of directional freezing and clear cubes
To make clear ice at home consistently, you need to control how the water freezes. In a normal plastic tray the freezing process attacks the cube from every side, so ice forms on the top, bottom, and sides at once and squeezes air bubbles and minerals into the center, which is why the ice cloudy core appears. Directional freezing flips that script by forcing the water to freeze from one direction only, usually from the top down, so unwanted air and impurities are pushed to the bottom of the container water instead of being trapped inside your clear ice.
When you use directional freezing in an insulated container at home, the cold air from the freezer touches only the exposed surface of the water. The insulation around the sides and bottom slows the freezing process there, so the top layer becomes ice clear first while the remaining liquid water underneath still holds the air bubbles and minerals that will later freeze cloudy. In a typical home freezer set between about -18 and -15 degrees Celsius (0 to 5 degrees Fahrenheit), a 2 to 3 liter container usually needs around 18 to 30 hours to freeze from the top down. You then stop the freezing before the cloudy ice forms at the bottom, remove the block, and cut away the small cloudy section, leaving a thick slab of clear ice that works beautifully in stirred drinks.
Some people try boiling water to make clear cubes, but boiling water alone will not fully solve cloudy ice problems. Boiling water can reduce dissolved gases a little, yet without directional freezing the cube still freezes from all sides and traps new air bubbles as it cools, so the ice cloudy center returns. If you want to make clear ice at home that looks like bar quality ice cubes, focus on directional freezing first and treat boiling water as an optional extra step rather than the main solution.
Method 1: small cooler in the freezer for crystal blocks
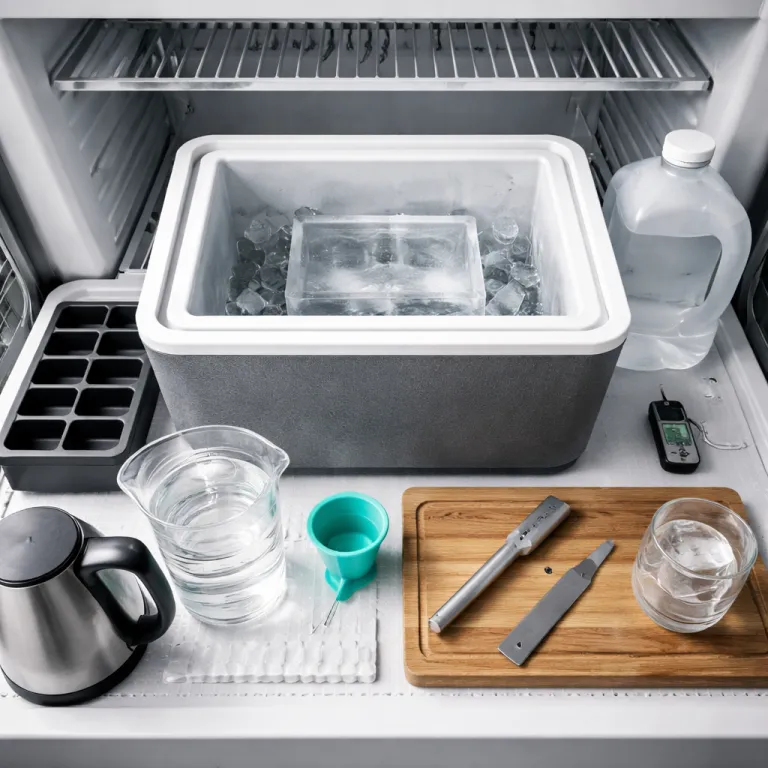
The most reliable way to make clear ice at home is to use a small insulated cooler inside your freezer. Fill the container with cold tap water or filtered water, leave the lid off so cold air can reach the top, and slide the cooler into the freezer with enough space around the sides for air circulation, then let the freezing process run slowly for about 24 hours. The insulation keeps the sides and bottom of the container water warmer for longer, so the top surface freezes first and forms a thick layer of clear ice while the cloudy ice and air bubbles collect in a small unfrozen pocket at the bottom.
Step by step cooler method checklist
- Use a 2 to 4 liter hard sided cooler that fits flat on your freezer shelf.
- Fill it 75 to 80 percent full with cold tap or filtered water, leaving headspace.
- Place the open cooler in a -18 to -15 °C (0 to 5 °F) freezer for 20 to 30 hours.
- Perform a quick freezer check: the top should be solid with 2 to 5 centimeters of liquid or slushy ice underneath.
- Remove the cooler, rest it on the counter for 5 to 10 minutes until the sides loosen, then flip and slide the block out carefully so you do not crack the clear ice.
When you perform your freezer check the next day, you should see a solid block of clear ice on top with a thin layer of liquid or cloudy ice underneath. Remove the cooler from the freezer, let it sit at home on the counter for a few minutes until the sides loosen, then flip the container and slide the block out carefully so you do not crack the clear ice. You can then cut off the cloudy section with a serrated knife, leaving a clean slab of ice clear enough to cut into large cubes or long spears for highball drinks.
To shape the block, place it on a cutting board with a small towel underneath so the ice will not slide. Score the surface where you want each ice cube to break, then press down with controlled force until the block splits into neat ice cubes that fit your favorite drink glasses, and work clear across the slab in rows. This method of making clear blocks in a cooler gives you enough clear ice for many drinks at once, and once you practice a few times you will cut and store new batches of ice easily every week.

Method 2: directional freezing with silicone molds
If you prefer individual shapes, you can still make clear ice at home using silicone molds with insulation. Place the silicone ice cube mold inside a larger container, fill the mold cavities with cold tap water, then add more water around the mold in the outer container so the sides are insulated by liquid and the top of each cube remains exposed to the freezer air. This setup creates directional freezing from the top down in each cavity, pushing air bubbles and minerals toward the bottom of the mold where a small cloudy ice layer will form that you can later trim away.
Step by step silicone mold method checklist
- Choose a silicone mold that makes large ice cubes of at least 4 centimeters per side.
- Set the mold inside a slightly larger plastic container and fill the mold cavities with cold tap water.
- Add water to the outer container until it reaches just below the top of the mold, leaving the cube tops exposed.
- Place the setup in a -18 to -15 °C (0 to 5 °F) freezer for roughly 18 to 24 hours.
- Lift one corner of the mold to check that a thin pocket of unfrozen container water or cloudy ice remains at the bottom, then stop freezing before that section fully hardens.
For best results, choose a mold that makes large ice cubes of at least 4 centimeters per side, because a bigger cube melts slower and keeps your drink colder without rapid dilution. When the freezing process is almost complete, perform a quick freezer check by lifting one corner of the mold to see whether a thin pocket of unfrozen container water or cloudy ice remains at the bottom, then stop freezing before that section fully hardens. Pop the cubes out at home, cut off the cloudy base with a sharp knife, and you will have compact pieces of clear ice that drop into drinks easily and look close to what you see in cocktail bars.
Silicone molds are ideal for people making clear ice in small freezers where a cooler will not fit. You can run several molds at once, rotate batches through the freezer, and always keep a container of clear ice cubes ready for weekend drinks or guests, which makes home entertaining smoother. This method also lets you experiment with different cube shapes and sides, from spheres to tall spears, while still using the same directional freezing principles that keep air bubbles out of the ice.

Cutting, handling, and storing clear ice without losing clarity
Once you have a block of clear ice, how you cut and store it will decide whether it stays clear or turns cloudy again. Always let the block temper at home on the counter for a few minutes so the surface warms slightly, because cutting rock hard ice straight from the freezer can cause sudden cracks and send air bubbles racing through the cube. Use a serrated bread knife to score shallow lines along the sides where you want to make each cut, then tap the back of the knife with a small mallet so the block breaks cleanly into clear ice cubes.
After cutting, place the cubes in a shallow container with a lid, leaving a little space between each ice cube so they do not freeze together. Put the container back into the freezer and avoid opening the door too often, because warm humid air from your home rushes in and condenses on the cold ice, forming a frosty layer that makes the ice cloudy again over time. Even perfectly clear ice will start to haze after about three days as freezer odors and micro frost build up on the surface, so for making clear drinks it is best to rotate stock and use your oldest cubes first.
If your freezer runs very dry and cold, clear ice can keep its clarity for close to a week, but you still need to perform a quick freezer check every few days. Look for signs that the ice cloudy layer is forming on the outside, such as a white film or rough texture on the cube sides, and move those cubes to the front of your drink rotation. When you serve, rinse each cube briefly under cold tap water to remove loose frost, then drop the ice into the glass so it will sit smooth, crack less, and chill your drinks evenly.
When a dedicated clear ice maker is worth the investment
For most cocktail fans, learning how to make clear ice at home with a cooler or silicone molds is enough, and the freezing process costs almost nothing beyond your time. A dedicated clear ice maker becomes interesting when you host large groups often, run a home bar for events, or want perfectly consistent ice cubes without manual cutting, because these machines automate directional freezing and eject clear ice blocks or cubes on a schedule. They use controlled water circulation and directional freezing plates to push air bubbles and minerals out of the ice, so every cube is dense, clear, and sized precisely for standard drink recipes.
These clear ice makers are not cheap, and many models cost between roughly 300 and 500 US dollars according to typical retail listings, which is a serious investment for a home bar. If you only make a few drinks each weekend, a small cooler and a sharp knife will work clear enough for your needs and let you make clear ice at home without that extra expense. However, if you run frequent tasting nights, shoot cocktail content, or care deeply about repeatable results, a machine that produces clear ice easily and stores it in a dedicated container can free up your freezer and keep your workflow smooth.
Even with a machine, water quality still matters because poor tap water can leave off flavors in otherwise clear ice cubes. Use filtered water when possible, clean the machine on schedule, and check that the container water reservoir stays fresh so the ice will taste neutral in delicate drinks like Martinis or highballs. Whether you rely on manual directional freezing or a dedicated clear ice maker, the goal is the same, which is to create ice clear enough that it almost disappears in the glass while it quietly keeps your drinks cold.
Key figures about clear ice and home freezing
- Clear ice contains far fewer trapped air bubbles than standard cloudy ice, which makes it denser and helps it melt noticeably slower in spirit forward drinks, as reported in many professional bar training guides and bartender manuals rather than formal lab studies.
- Search interest for how to make clear ice at home shows thousands of monthly queries in the United States in common keyword tools, reflecting strong demand from home bartenders who want bar quality ice without commercial equipment.
- Many dedicated clear ice makers for home use are priced in the range of about 300 to 500 US dollars in retail listings, which is substantially higher than the cost of a basic freezer and cooler setup but offers automation and consistency for heavy users.
- Large format clear ice cubes of about 4 to 5 centimeters per side can keep a stirred whisky drink at a stable temperature for significantly longer than smaller cloudy ice cubes, which often dilute the same drink noticeably in under 10 to 15 minutes according to practical home tests.
FAQ about making clear ice at home
Does boiling water alone make ice clear at home
Boiling water can remove some dissolved gases, but it does not control the freezing direction, so the cube still freezes from all sides and traps new air bubbles as it cools. You may see slightly less cloudy ice, yet the core often remains white and weak. For truly clear ice at home, you need directional freezing in an insulated container, with boiling water as an optional secondary step.
Why does my clear ice turn cloudy again after a few days
Even perfectly clear ice cubes slowly pick up frost and microscopic cracks in the freezer, especially when the door opens often and humid air rushes in. That moisture freezes on the cube surface and makes the ice cloudy, while odors from food can also cling to the ice and affect taste. Store clear ice in a sealed container, minimize door openings, and rotate stock so you use older cubes first.
Is filtered water necessary for making clear ice
Filtered water is not strictly required for clarity, because directional freezing can push many minerals into the discarded cloudy section at the bottom of the block. However, filtration improves taste by removing chlorine and off flavors that would otherwise show up in spirit forward drinks. If your tap water has a strong smell or taste, use a basic filter jug for better ice quality.
How large should clear ice cubes be for cocktails
For most whisky or Old Fashioned style drinks, a cube around 4 to 5 centimeters per side offers an excellent balance between chilling power and slow dilution. Highball drinks often benefit from tall spears that match the glass height, because more surface area in contact with the drink cools it quickly while the dense clear ice melts slower overall. Very small cubes or crushed ice are better reserved for drinks that are meant to dilute quickly, such as tiki cocktails.
When is a dedicated clear ice maker better than manual methods
A dedicated clear ice maker becomes worthwhile when you need a steady supply of identical clear cubes without manual cutting, such as for frequent parties, home events, or content creation. These machines automate directional freezing and can produce dozens of clear cubes per cycle, saving time compared with cooler blocks. If you only make a few cocktails each week, manual directional freezing in a small cooler or silicone mold will usually be more cost effective.
Why did my batch of clear ice still freeze cloudy
If your clear ice comes out cloudy, common causes include freezing the container for too long, using a freezer that is much colder than -18 °C (0 °F), or blocking the top surface so cold air cannot reach the water evenly. Check that your freezer temperature is in the recommended range with a simple thermometer, leave the top of the container open, and stop the freezing process while a small pocket of liquid water still remains at the bottom so the cloudy section can be trimmed away.