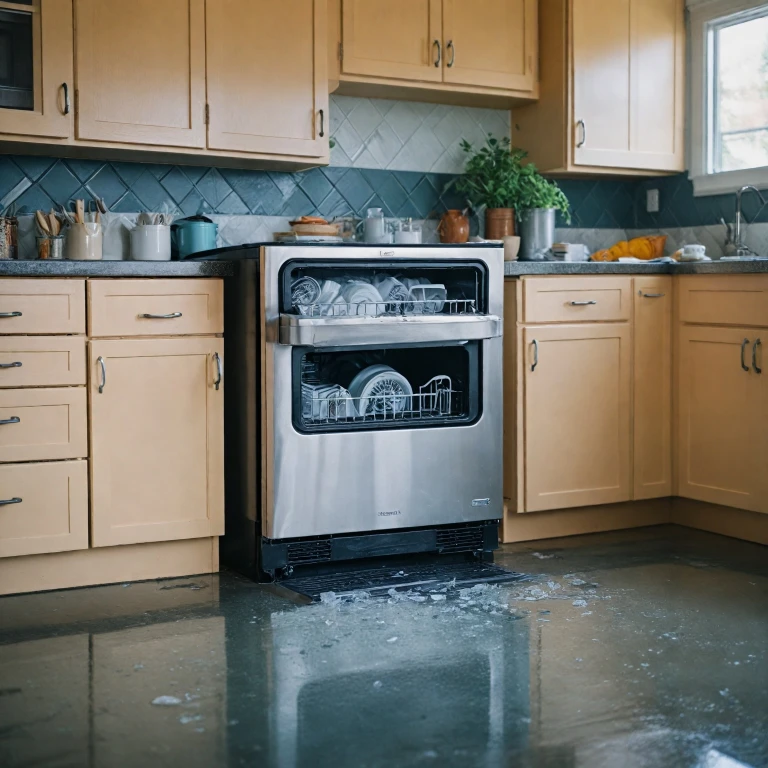

Understanding why an ice maker is leaking in your home
When an ice maker is leaking, buyers often worry the entire machine has failed. In reality, most leaks come from a few predictable points where ice and water interact inside the unit. By learning how these areas work, you can quickly check them before you call a technician.
Every ice maker relies on a controlled water fill cycle that feeds a cube tray. If the water inlet valve sticks open or the fill tube is misaligned, you may see leaking water or water coming from the back of the refrigerator. This type of leak can drip into the ice bin, onto shelves, or down toward the defrost drain.
In a typical refrigerator ice system, the inlet valve opens for a set step in the cycle. The valve allows water to flow through a fill tube into a fill cup, which then directs water into the cube tray to make ice cubes. If the fill cup cracks or the fill tube ices over, the water will overflow and you will notice water pooling under the unit.
Some ice makers share the same water line as the refrigerator dispenser, so a single leak can affect both functions. When the ice machine is making ice, pressure in the line increases and small leaks become visible as droplets or slow leaks. Buyers should check behind the refrigerator ice compartment and along the drain area whenever they notice water on the floor.
Because ice makers operate near freezing temperatures, plastic parts become brittle over time. A small crack in the ice bin, cube tray, or internal drain channel can send leaking water into hidden spaces. Careful inspection of these parts will help you keep ice clean and prevent damage to surrounding cabinets.
Key leak points in an ice maker and how to check them
When an ice maker is leaking, start with a structured visual inspection. Pull the refrigerator away from the wall, unplug the unit, and shut off the water supply before you check any components. This simple safety step protects you from shocks and prevents additional leaks while you work.
First, examine the water inlet valve at the back of the refrigerator ice system. Look for mineral buildup, corrosion, or signs of leaks around the valve body and fittings. If you see dried white streaks or rust, the inlet valve may be seeping and sending leaking water down the back panel.
Next, follow the water inlet line from the valve toward the ice machine compartment. Gently run your fingers along the tubing to notice water or damp spots that indicate small leaks. Pay attention to any plastic quick connect fittings, because these can loosen over time and cause the ice maker leaking problem to worsen.
Inside the freezer, remove the ice bin and inspect the fill tube and fill cup assembly. If the fill tube is partially frozen, water coming into the system will spray sideways and leak instead of entering the cube tray. Clear any ice, then check that the fill cup is not cracked and that it aligns correctly with the cube tray.
Also inspect the defrost drain opening at the bottom of the freezer compartment. A clogged defrost drain can cause water to back up and freeze around the ice makers, which then melts and appears as random leaks. Cleaning this drain with warm water will help keep ice from bonding to internal parts and reduce future leaks.
For buyers comparing different ice machine designs, note that freestanding units often have an external drain hose. You can review how premium freestanding ice makers manage drain routing by reading this guide on top freestanding ice makers. Understanding these layouts will help you evaluate where leaking water might appear around a new unit.
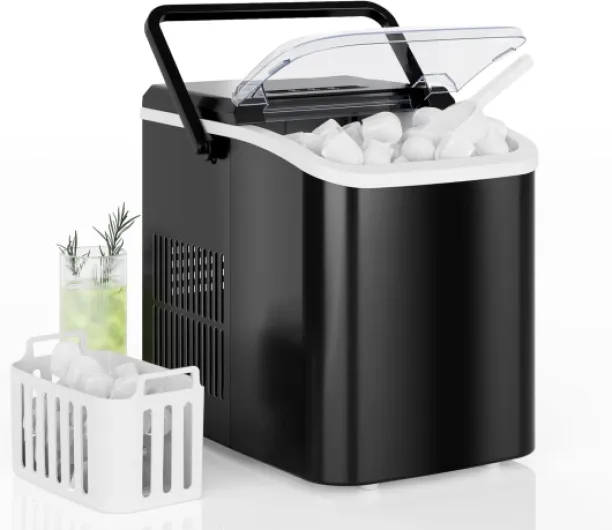
- + Fast Ice Production: 9 bullet ice cubes in just 6 minutes
- + Self-Cleaning Function: Easy maintenance
- + Portable: Ideal for home, kitchen, RV, and camping
- + Compact Design: Saves space on countertop
- + Quiet Operation: Doesn't disturb your environment
How water pressure, valves, and drains create ice maker leaks
Stable water pressure is essential to prevent an ice maker leaking during normal operation. Excessive pressure can force the water inlet valve to leak, while low pressure may cause incomplete fills that freeze unevenly in the cube tray. Both conditions can send water coming out of unexpected places around the machine.
The inlet valve is an electrically controlled gate that opens for a timed step in the cycle. If debris lodges inside the valve, it may not close fully and will allow a slow leak into the fill tube and fill cup. Over hours, this extra water can overflow the cube tray and drip into the ice bin or down toward the defrost drain.
Buyers should also consider how the refrigerator ice defrost system interacts with the drain. When the defrost drain is partially blocked, meltwater can refreeze around the ice makers and redirect leaking water toward door seals or cabinet seams. This situation often leads owners to think the refrigerator itself leaks, when the root cause is a restricted drain channel.
In some ice machine models, a dedicated drain pump moves water to a nearby sink or floor drain. If this pump fails or the drain hose kinks, you may notice water pooling under the unit instead of exiting through the drain. Regularly check the hose routing and pump housing for signs of leaks or vibration damage.
When evaluating premium brands, many buyers look at reliability data for the water inlet and drain systems. You can learn how one manufacturer structures its coverage by reading about the benefits of Manitowoc ice machines, which often highlight durable valves and robust drain designs. These design choices directly influence how often an ice maker leaking issue will appear over the product’s life.
If you own a built in unit, review the installation manual to check the recommended water pressure range. A simple pressure gauge on the supply line can confirm whether your home conditions match the machine requirements. Correct pressure helps keep ice production stable and reduces the risk of leaks from stressed fittings.
Practical troubleshooting steps before you call a technician
When you notice water around your refrigerator ice compartment, start with simple checks. Confirm that the refrigerator is level from side to side and front to back, because a tilted unit can cause the ice maker leaking into areas it was never designed to reach. Adjust the front feet until doors close smoothly and water drains correctly toward the defrost drain.
Next, remove the ice bin and examine the ice cubes for shape and clarity. Misshapen or hollow ice cube pieces often indicate incorrect fill volume, which can send leaking water over the edge of the cube tray. If cubes are fused together, the fill tube may be dripping slightly between cycles and overloading the tray.
Inspect the fill tube for ice buildup and gently clear any blockage with warm water. Then check the fill cup alignment by watching a test cycle, ensuring water coming from the tube lands squarely in the cup. If the stream hits the edge, loosen the mounting screws and reposition the ice maker so the cup sits directly under the tube.
Look closely at the water inlet valve connections and confirm each plug and compression nut is tight. A quarter turn on a loose fitting can stop small leaks that slowly soak insulation or flooring under the unit. After tightening, dry the area thoroughly and recheck for leaking water after several ice making cycles.
For buyers who want to keep ice tasting clean, replace the refrigerator water filter on schedule. A clogged filter can reduce flow, causing the valve to chatter and sometimes leak at its seals. Fresh filters also help ice makers maintain consistent cube size and reduce mineral deposits in the defrost drain.
If you are unsure about any step or see signs of electrical damage, stop and call a qualified technician. Professional service will protect your warranty and ensure the ice machine, drain system, and water inlet components are tested correctly. This balanced approach lets you handle basic checks while relying on expert help for complex leaks.
When to repair, replace, or upgrade a leaking ice maker
Repeated ice maker leaking problems often signal that key components are worn beyond simple adjustment. When the cube tray coating peels, the fill cup cracks, or the ice bin warps, leaks can return even after careful repairs. At this stage, buyers should weigh the cost of parts and labor against the price of a new unit.
Start by listing the components that show visible damage, such as the water inlet valve, fill tube, or drain hose. Obtain price estimates for each part and compare them with the age and performance of the current ice machine. If the refrigerator ice system is older and already struggles with making ice consistently, replacement may offer better long term value.
Modern ice makers often include improved insulation, more precise inlet valve control, and better drain routing. These upgrades help keep ice colder, reduce sweating on exterior panels, and minimize leaking water around door gaskets. Buyers who upgrade can also benefit from quieter operation and more efficient water use.
When evaluating new ice makers, pay attention to how the manufacturer designs the defrost drain and internal water paths. Clear diagrams and accessible components make future maintenance easier and reduce the need to call a technician for minor leaks. Look for models where the fill tube, fill cup, and cube tray can be removed without dismantling the entire freezer.
Before you continue shopping, review independent product tests that focus on leak resistance and long term reliability. Many detailed posts compare how different units handle water coming into the system and draining away after each cycle. These comparisons help you select a unit that will keep ice plentiful without constant worry about leaks.
For built in or commercial style units, consider extended coverage that specifically mentions the water inlet, drain pump, and ice makers. You can see how one brand structures this by reading about the Scotsman warranty for your ice maker. Clear warranty terms add confidence when investing in a higher capacity machine.
Maintenance habits that prevent future ice maker leaks
Consistent maintenance is the most effective way to prevent an ice maker leaking again after repairs. Schedule a simple inspection every few months to check the water inlet valve, drain path, and visible tubing. This routine helps you notice water issues early, before they damage flooring or cabinetry.
Begin by emptying the ice bin and washing it with warm, mild soapy water. Rinse thoroughly, dry completely, and reinstall it to keep ice fresh and reduce odors that can signal stagnant leaking water. While the bin is out, inspect the cube tray and fill cup for hairline cracks or mineral deposits.
Use a soft brush to clean around the fill tube opening and the defrost drain channel. Removing frost and debris ensures water coming from the defrost cycle flows smoothly to the drain instead of freezing around the ice makers. This simple step protects both the refrigerator ice system and the surrounding insulation.
Check the back of the unit for kinks in the water line and ensure the plug and power cord remain secure. Vibrations from the machine can slowly loosen fittings, so gently tighten any suspect connections to prevent future leaks. If you notice water stains on the wall or floor, mark their edges and recheck after several days of making ice.
Buyers who travel frequently should consider shutting off the water supply to the ice machine before long absences. This precaution prevents leaking water from going unnoticed if a valve fails while you are away. When you return, turn the water back on, purge the first batch of ice cubes, and verify that all joints remain dry.
Thoughtful maintenance not only keeps ice tasting clean but also extends the life of the entire unit. By combining regular checks with prompt repairs, you will keep ice production stable and minimize the risk of costly leaks. These habits support both everyday convenience and long term appliance reliability.
Working with professionals and protecting your investment
Some ice maker leaking scenarios require professional tools and diagnostic skills to resolve safely. If you suspect a hidden leak inside the cabinet walls or near electrical components, do not attempt invasive repairs yourself. Instead, document the symptoms, including where you notice water and when leaks occur during the cycle.
When you call a technician, provide details about the model, age, and any previous repairs. Mention whether the ice machine is built into the refrigerator or operates as a separate unit, because access points differ significantly. Clear information helps the professional plan which parts to check first, from the water inlet valve to the defrost drain.
During the visit, ask the technician to explain each step they take while inspecting the ice makers. Understanding how they test the inlet valve, examine the fill tube, and evaluate the drain path will improve your own future troubleshooting. Many experts are willing to show you how to keep ice production stable between service calls.
If the technician recommends replacement, request a written estimate that compares repair and new unit costs. Include the price of key components such as the cube tray, fill cup, ice bin, and drain pump, along with labor. This breakdown allows you to make a rational decision instead of reacting only to the frustration of leaking water.
For buyers planning to continue shopping for a higher capacity machine, ask which designs have the most reliable water inlet and drain systems. You can then compare those recommendations with independent posts and product tests that focus on leak performance. Aligning professional advice with objective reviews will help you select a refrigerator ice or standalone ice machine that fits your needs.
Finally, keep all service records, part invoices, and warranty documents in a dedicated folder. These records prove maintenance history if you need support from the manufacturer and help future technicians check what has already been done. Organized documentation is a simple way to protect your investment and keep ice makers performing reliably for years.
Key statistics about ice maker leaks
- Up to 60 % of household ice maker leaks originate from loose or damaged water inlet connections.
- Clogged defrost drains account for approximately 25 % of reported refrigerator ice water issues.
- Regular six month inspections can reduce serious leak incidents by nearly 40 % in typical homes.
- Replacing worn cube trays and fill cups lowers repeat leak rates by around 30 % in older units.
Common questions about ice maker leaking issues
Why is my ice maker leaking inside the freezer compartment ?
Internal leaks usually come from an overfilling cube tray, a misaligned fill cup, or a partially frozen fill tube. Water then spills over into the ice bin or freezes along interior panels. Checking these components and clearing the defrost drain often resolves the problem.
Can high water pressure cause my ice maker to leak water ?
Yes, excessive water pressure can force the inlet valve to leak or overfill the tray. This leads to water coming out of the fill area and freezing in unwanted places. Installing a pressure regulator on the supply line can stabilize flow and reduce leaks.
How do I know if the water inlet valve is faulty ?
Signs of a failing inlet valve include slow dripping at the back of the refrigerator, inconsistent ice cube size, and visible mineral buildup on fittings. If you shut off power but still notice water entering the ice maker, the valve may be stuck partially open. In that case, replacement is usually safer than attempting repair.
Should I turn off my ice maker if I see leaking water ?
Turning off the ice maker and closing the water supply is a prudent first step. This prevents additional leaking water while you inspect visible parts or wait for a technician. Once the cause is resolved, you can restore power and monitor several cycles for any new leaks.
When is it better to replace the ice maker instead of repairing it ?
Replacement becomes sensible when multiple components such as the cube tray, fill cup, and inlet valve are worn or cracked. If repair costs approach half the price of a new unit and the machine is older, an upgrade often provides better reliability. Newer models also tend to manage drains and water flow more efficiently, reducing future leak risks.