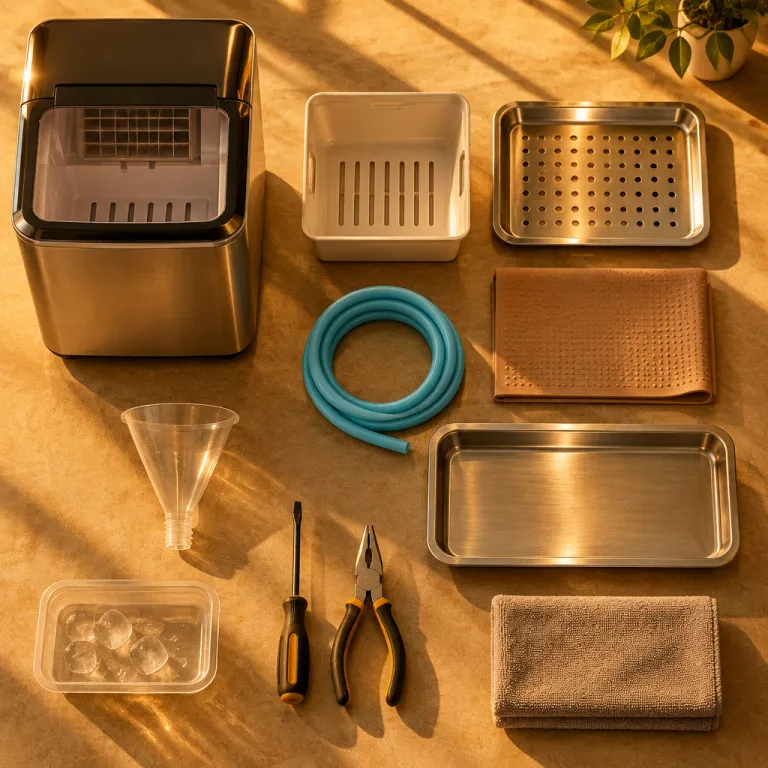
Why drainage matters for countertop ice makers in daily family use
Every countertop ice maker turns cold water into fresh ice, then lets that ice slowly melt back into the reservoir. When the bin is full and the reservoir already holds as much maker water as the machine allows, that extra water has nowhere safe to drain. It seeps under the unit, runs toward the nearest edge of the countertop, and will eventually stain wood, swell laminate or leave cloudy rings on stone.
TL;DR drainage checklist
- Match daily ice production to what your family actually uses so the bin does not stay full and constantly melting.
- Always place a drip tray or waterproof mat under the machine, especially on wood or laminate countertops.
- Use the drain port with a food grade tube to route meltwater to a sink or bucket whenever possible.
- Keep vents clear and leave a small gap around the sides and back so warm air can escape.
- Clean the reservoir and drain regularly to prevent clogs and hidden leaks.
During testing, I measure how much ice is produced per hour and compare that ice production with the internal water ice storage capacity of the unit. When the ice produced exceeds what your family actually uses, the bin stays full, the melt rate rises, and the drain risk climbs because the machine keeps cycling until you press the power plug button or empty the basket. That is why a realistic product summary should always balance stated capacity, countertop ice footprint and the way your household really consumes ice.
Many portable ice makers do not include a built in gravity drain, so they rely entirely on manual emptying. If you forget to remove ice from the bin before school runs or bedtime, the water level creeps up and quietly reaches the lip of the internal maker drain port. By the time you read the product manual again, the damage to the countertop parts below the unit may already be visible as warped edges or darkened seams.
Drip trays, silicone mats and the under machine safety layer
The simplest ice maker drainage solution countertop buyers can use is a rigid drip tray sized slightly larger than the base of the machine. This tray catches stray water that escapes from the drain or from condensation, and it creates a visible buffer zone between the unit and the wood or stone surface. For most family kitchens, this single accessory will prevent the slow, hidden leaks that cause long term countertop damage.
Under machine silicone mats work differently from hard trays, because they absorb vibration and channel water toward the front where you can see it. On polished stone, a raised lip mat keeps water ice from spreading sideways, while on laminate a textured mat reduces the risk that the product will slide when you remove ice baskets or pull the unit forward for cleaning. When you install a mat, leave at least two centimetres (about 3/4 inch) of space around the back and sides so warm air from the ice machine can still circulate.
For heavy nugget ice makers with higher capacity, I often combine a rigid tray with a thin silicone layer underneath to protect both the tray and the countertop. This stacked approach supports the weight of the ice maker unit, keeps the drain area visible, and will make routine cleaning easier because you can remove the entire assembly in one motion. If you plan a permanent spot for your portable ice machine, treat the under machine mat as essential protection, not an optional accessory.
For more detail on how drainage and placement interact with plumbing choices, see this guide on the ice maker water line and installation options, which explains where a unit can safely live in your kitchen.
DIY overflow management using the drain port and a nearby sink
Many countertop ice makers include a small drain port at the rear or base, intended for occasional emptying during deep cleaning. With a little planning, that same maker drain port can become a continuous safety outlet that sends excess water directly to a sink instead of onto your cabinets. This approach turns a basic portable ice product into a semi self draining unit without modifying any internal parts.
To build this DIY ice maker drainage solution countertop owners need only a food grade silicone tube, a secure clamp and a way to route the tube downward. As a concrete example, a compact unit such as a typical 26 pound per day (around 12 kilogram per day) bullet ice maker often uses a drain opening around 10 to 12 millimetres (roughly 3/8 to 1/2 inch) in diameter, which pairs well with standard 3/8 inch (about 10 millimetre) inner diameter tubing. You gently remove the factory cap from the drain, slide the tube over the port, then install a clamp so the connection will not slip when the machine vibrates during ice production. The other end of the tube should rest inside a sink, a floor drain or a small bucket that you can easily empty and clean.
DIY drain tube quick setup
- Measure the drain port and buy matching food grade silicone tubing plus a small hose clamp.
- Unplug the ice maker, remove the original drain cap and dry the area around the port.
- Push the tube fully onto the drain fitting, then tighten the clamp until the tube cannot twist.
- Route the tube downward with no kinks so gravity can move water to the sink or bucket.
- Test the setup with plain water before restarting normal ice production.
When you read the cleaning instructions in the product manual, you will usually find a warning about keeping the drain closed during normal ice production. That warning exists because an open drain without a tube can leak water onto the countertop, but once your tube is in place the risk shifts away from the surface and toward the sink where it belongs. Always test the system with plain water first, then run the ice machine for one full cycle and check that every drop of water ice melt reaches the sink.
If your unit suddenly stops making ice or starts leaking around the drain area, follow a structured diagnostic process before assuming a major failure, using a checklist such as this one on what to check when an ice maker is not making ice so you can rule out simple issues like a loose plug or a blocked drain tube.
Absorbent mats versus hard trays for different countertop materials
Choosing between absorbent mats and hard trays depends on both your countertop material and your family’s habits. On sealed stone or solid surface, a rigid tray under the ice maker unit usually works best because it contains water and lets you see leaks immediately. On wood or laminate, an absorbent mat under the machine adds a second layer of protection against slow, unnoticed moisture.
Absorbent mats excel when kids frequently grab ice and spill maker water around the front of the product. The fabric captures small splashes from cups and from the removable ice basket, while the waterproof backing stops that water from reaching the wood below. You still need a clear path for air around the sides of the ice makers, so choose a mat that matches the footprint of the machine without blocking ventilation slots or the rear drain.
Hard trays are better when you want precise control over where water flows during cleaning and maintenance. When you remove ice from the bin or tilt the unit to empty the reservoir, the tray catches every drop and channels it toward the front where you can wipe it away. For households that use nugget ice or high capacity countertop ice makers, a tray also simplifies periodic descaling because you can follow the cleaning instructions in the manual without carrying the wet machine across the kitchen.
Whatever option you choose, always read customer reviews that mention drainage, because real world feedback often reveals whether the product design tends to leak from specific parts. A well designed ice machine will keep most water inside the system, but a smart external mat or tray strategy turns small design flaws into manageable maintenance tasks instead of expensive countertop repairs.
Self draining models, plumbing needs and the position hack near the sink
Some countertop style ice makers are actually compact self draining machines with built in gravity drains. These models include a dedicated maker drain connection that sends melt water directly to a standpipe, a nearby sink or a floor drain, which dramatically reduces the chance of countertop damage. They suit households that run continuous ice production for entertaining or large families.
When you install a self draining ice maker, you must respect both the height of the drain and the path of the tube. Gravity drain systems only work when the drain port on the unit sits higher than the connection point at the sink or wall, so careful positioning will determine whether water flows freely or backs up into the machine. Before you commit to a location, read the product manual, check the recommended drain height and confirm that your chosen countertop can support the weight and capacity of the full unit.
If you do not want permanent plumbing, a simple position hack can still give you many of the same benefits. Place the ice maker so its drain side slightly overhangs the sink edge, then open the drain only when you need to empty warm water after cleaning or after a long pause in ice production. This approach keeps water ice away from wood and laminate, while letting you maintain a flexible portable ice setup that you can move when needed.
For buyers comparing water line and drainage options across different ice makers, a detailed resource on ice maker plumbing and placement can help you match the right machine to your kitchen layout and your family’s daily routine.
Cleaning, filters, manuals and warranties that protect both machine and countertop
Good drainage only works when the internal water paths of the ice maker stay clean and unobstructed. Mineral buildup or food debris can clog the drain port, forcing water to find new exits around gaskets or seams and eventually under the unit. That is why every product summary should highlight not only capacity and ice production, but also the clarity of the cleaning instructions and the accessibility of key parts.
During hands on testing, I always read the full product manual before the first batch of ice is produced. I check how to remove ice baskets, how to access the maker drain, and whether the manufacturer recommends a specific water filter to reduce scale and improve the taste of water ice in drinks. A clear manual will also explain how often to run cleaning cycles, how to use any built in cleaning mode, and which cleaning solutions will not void the warranty product coverage.
Routine cleaning protects both the ice machine and the countertop below it. When you unplug the unit, drain the reservoir and wipe the interior, you also have a chance to inspect the under machine mat or tray for hidden leaks or stains. If you notice repeated moisture in the same area, that is a signal to adjust the drain setup, replace worn parts or contact support before small issues become structural damage.
Customer reviews are especially valuable here, because they reveal how real families manage cleaning and drainage over months of use. Look for patterns in feedback about maker ice quality, water taste, and any need to remove or reinstall drain tubes after service. A strong warranty product combined with responsive support gives you confidence that the manufacturer stands behind both the machine and the drainage design you rely on every day.
Optimizing ice use, taste and placement for long term performance
Drainage solutions work best when they are part of a broader plan for how your family uses ice. If you routinely overfill the bin and let ice produced sit for hours, you increase melt, stress the drain system and raise the risk of overflow onto the countertop. Matching daily ice production to real consumption keeps both the machine and the surrounding surfaces in better condition.
One practical strategy is to schedule ice production around peak times, such as school mornings, evening dinners and weekend entertaining. Run the ice maker ahead of those windows, then pause the machine or remove ice to a freezer bin once you have enough for drinks, lunch boxes and water bottles. This habit reduces the amount of water sitting in the reservoir, lightens the load on the drain and keeps nugget ice or cube ice fresher for better flavor.
Placement also affects both taste and drainage. Keeping the unit near a cold water source and away from direct sunlight helps stabilize internal temperatures, which improves ice production efficiency and reduces unnecessary melting. For readers interested in how ice quality shapes drinks, this guide on the ideal ice to drink ratio shows how the right amount of water ice can enhance flavor while still respecting the limits of your drainage setup.
Key figures on countertop ice maker drainage and performance
- Most countertop ice makers are rated by manufacturers between roughly 10 and 15 kilograms (about 22 to 33 pounds) of ice per day, which means several litres of melt water must pass safely through the drain or reservoir in a typical household. Always check the specification label on your specific model for exact numbers.
- Independent lab tests on compact ice machines occasionally report that even a very thin pool of standing water trapped under a unit can raise the relative humidity at the countertop surface and accelerate damage to wood veneers and laminate seams. Treat these indicative findings as general guidance rather than precise predictions, because real results vary with room temperature, ventilation and countertop finish.
- Field surveys from appliance service companies often note that improper placement and blocked drains account for a large share of non mechanical ice maker service calls, frequently resolved without replacing any internal parts. These observations come from aggregated technician reports rather than a single published study.
- Manufacturers that include clear cleaning instructions and visible drain access in the product manual consistently report fewer warranty product claims related to leaks, because owners are more likely to maintain the drain path correctly. This pattern appears in internal feedback shared by support teams and dealer networks.
- Consumer testing groups and long term user panels commonly find that adding a simple under machine mat or tray can significantly reduce visible countertop staining from ice maker moisture over the first year of use. These numbers are best viewed as practical estimates to guide buying decisions, not exact forecasts for every kitchen.
FAQ about drainage solutions for countertop ice makers
Do all countertop ice makers need a separate drain solution ?
Not every countertop ice maker requires an external drain tube, but every unit benefits from some form of protection such as a tray or mat. Models without built in gravity drains rely on manual emptying, so any forgotten water can still leak onto the surface. A simple under machine layer is usually enough to prevent long term countertop damage.
Can I connect my countertop ice maker directly to the sink drain ?
You can route a silicone tube from the drain port to a sink or standpipe if the manufacturer allows it in the manual. The key is to keep the drain outlet on the machine higher than the connection point so gravity can move the water. Always test the setup with plain water before running full ice production.
What type of mat is best under an ice maker on wood countertops ?
On wood countertops, a waterproof mat with an absorbent top layer offers the best balance of protection and stability. It catches small spills from cups and from the ice bin while blocking moisture from reaching the wood surface. Pairing that mat with a small front lip tray adds extra security during cleaning.
How often should I clean the drain on a countertop ice maker ?
Most manufacturers recommend draining and wiping the reservoir at least once per week in regular family use. In hard water areas, a monthly deep clean with a food safe descaling solution keeps the drain path clear. Always follow the specific cleaning instructions in your product manual to avoid damaging internal parts.
Will using a tray or mat affect the performance of my ice machine ?
A properly sized tray or mat will not reduce ice production as long as it does not block air vents or restrict airflow around the sides and back of the unit. Leave a small gap behind the machine so warm air can escape freely. If the product feels unusually hot, check that the mat or tray is not covering any ventilation openings.